 Save
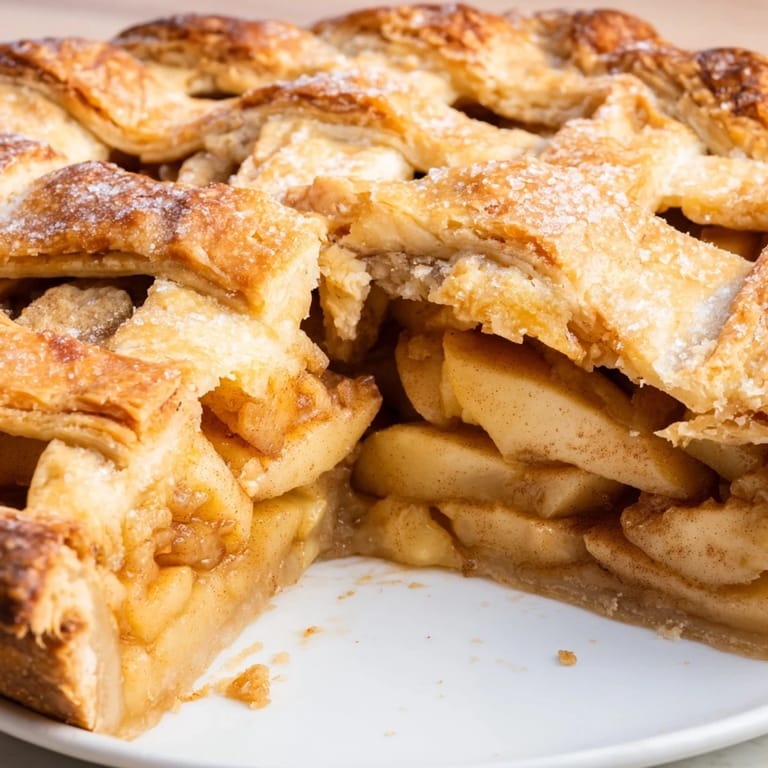
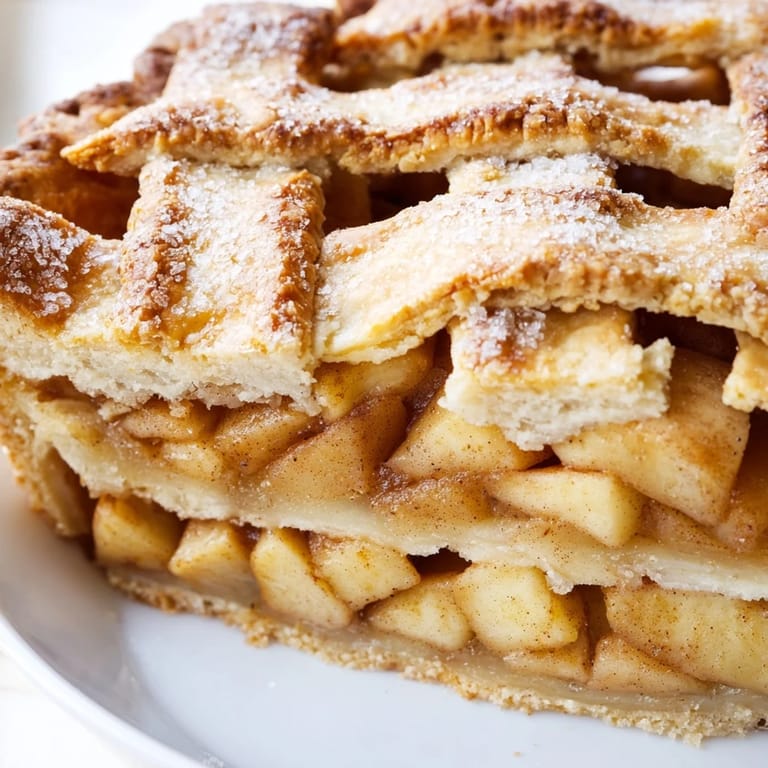
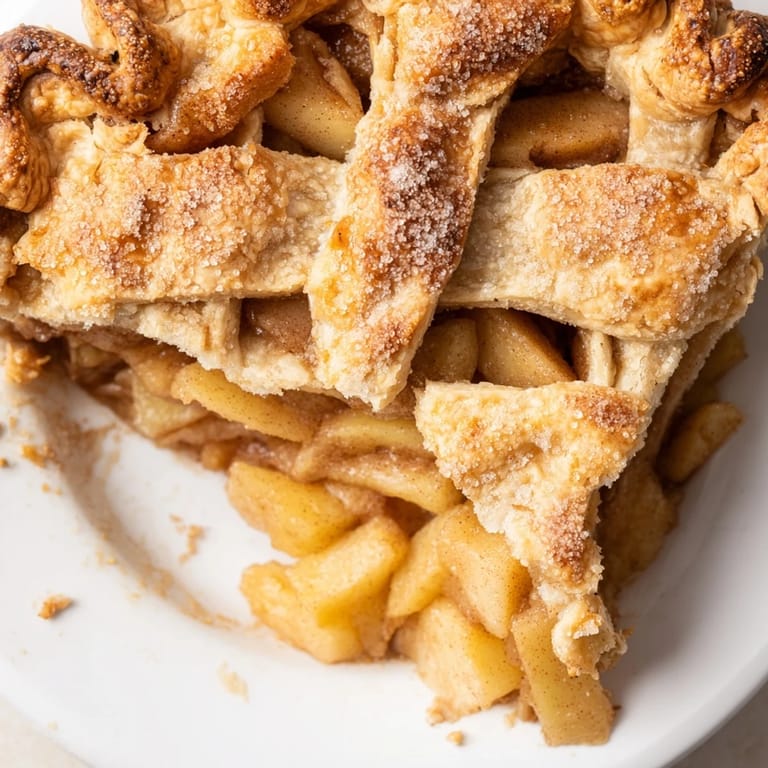
Save The smell of cinnamon and butter wafting through the house on a crisp autumn afternoon is one of those simple pleasures that makes everything feel right. My grandmother never measured anything, but her apple pies always emerged from the oven with that perfect golden crust that promised something magical inside. I spent years trying to decode her method, watching her hands work flour and butter with an ease that seemed almost effortless. Now, after many kitchen experiments and plenty of flour-dusted countertops, I finally understand what makes a truly exceptional apple pie.
Last Thanksgiving, I brought this pie to my first potluck with my new partners family. The kitchen was already crowded with casseroles and side dishes, but something about a homemade apple pie makes people pause. I watched my partners uncle take that first bite, eyes closing for just a second, and knew exactly what he was tasting. That flaky butter crust giving way to tender apples that still had a bit of bite, all wrapped up in warmth and cinnamon. Someone asked for the recipe before we even finished dessert.
Ingredients
- All-purpose flour: The backbone of your crust, providing structure while staying tender
- Cold unsalted butter: Essential for those flaky layers that make a pie crust unforgettable
- Ice water: Keeps the butter from melting too fast, which is the secret to a flaky texture
- Granny Smith and Honeycrisp apples: The combination holds its shape while baking and balances sweet with tart
- Both granulated and brown sugar: White sugar gives structure while brown adds depth and caramel notes
- Ground cinnamon and nutmeg: Classic warm spices that remind everyone why they love autumn
- Lemon juice: Prevents apples from browning and brightens all those warm spices
Tired of Takeout? 🥡
Get 10 meals you can make faster than delivery arrives. Seriously.
One email. No spam. Unsubscribe anytime.
Instructions
- Prepare the pie crust dough:
- Whisk together flour, salt, and sugar in a large bowl, then work in cold butter with your fingertips or pastry blender until the mixture looks like coarse crumbs with some pea-sized pieces remaining
- Add ice water gradually:
- Sprinkle in the water one tablespoon at a time, tossing gently with a fork, just until the dough holds together when squeezed
- Chill the dough:
- Divide dough in half, form into disks, wrap tightly, and refrigerate for at least an hour to let the gluten relax
- Slice the apples:
- Peel, core, and cut apples into even 1/4-inch slices so they cook uniformly in the oven
- Season the filling:
- Toss apples with both sugars, cinnamon, nutmeg, salt, flour, and lemon juice until every slice is coated
- Roll out the bottom crust:
- On a floured surface, roll one dough disk into a 12-inch circle and carefully transfer it to your pie dish
- Fill with apples:
- Pile the apple mixture into the crust, mounding it slightly higher in the center since it will settle while baking
- Add butter dots:
- Scatter the small butter pieces over the apples for extra richness and to help create a silky sauce
- Top with second crust:
- Roll out the remaining dough, place it over the filling, and trim, seal, and crimp the edges beautifully
- Create steam vents:
- Cut several slits in the top crust so steam can escape while the pie bakes
- Brush with egg wash:
- Mix the beaten egg with milk and brush over the crust, then sprinkle with coarse sugar for sparkle
- Bake until golden:
- Bake on the lower rack at 400F for 45-55 minutes until the crust is deeply golden and filling bubbles through the vents
 Save
Save There is something deeply satisfying about pulling a pie out of the oven and seeing that golden crust with steam puffing through the vents you cut. My daughter now asks to help crimp the edges, her small fingers pressing the dough just like I showed her, creating those familiar ridges that connect generations of bakers. We always save the first warm slice for the person who helped the most, even if that help was mostly eating the apple scraps.
Making It Ahead
The dough can be made up to three days ahead and kept refrigerated, or frozen for up to three months if you want to get a head start on holiday baking. You can also fully assemble the pie and freeze it unbaked, then add about 15 minutes to the baking time when you are ready to bake it fresh.
Choosing Your Apples
I have learned the hard way that using only sweet apples makes for a one-dimensional pie that lacks that bright acidity. The Granny Smith apples hold their shape beautifully and provide tartness, while Honeycrisp brings natural sweetness and a tender crisp texture that complements rather than turns to mush.
Getting That Perfect Crust
Temperature control is everything when making pie crust. Keep your ingredients cold, work quickly, and do not overwork the dough or you will develop too much gluten and lose tenderness. If the butter starts feeling soft at any point, pop everything in the refrigerator for 15 minutes before continuing.
- Use a light touch when mixing, you want visible flecks of butter in your dough
- Roll from the center outward, rotating the dough frequently to prevent sticking
- If dough tears while transferring, patch it with scraps rather than starting over
 Save
Save Whether you are baking for a holiday feast or just because Tuesday needs something sweet, this apple pie delivers that perfect combination of comfort and craftsmanship. There is honestly nothing quite like a warm slice with melting vanilla ice cream to make any ordinary moment feel like a celebration.
Recipe FAQs
- → What apples work best?
Granny Smith and Honeycrisp create an ideal balance—Granny Smiths provide tartness and structure while Honeycrisps add natural sweetness. The mix holds shape beautifully during baking.
- → Why must the pie cool before slicing?
Resting allows the fruit filling to set properly. Cutting too early releases steam before the juices thicken, resulting in a runny texture instead of that perfect sliceable consistency.
- → Can I make the crust ahead?
Absolutely. Prepare the dough disks, wrap tightly, and refrigerate up to 2 days or freeze for up to 3 months. Thaw overnight in the refrigerator before rolling.
- → How do I prevent soggy bottoms?
Bake on the lower rack position to ensure thorough bottom crust cooking. Also, letting the filling sit briefly after tossing draws out excess moisture before assembly.
- → What's the purpose of the egg wash?
The beaten egg and milk create a golden, glossy finish while helping coarse sugar adhere. It's purely aesthetic but creates that bakery-quality appearance.