 Save
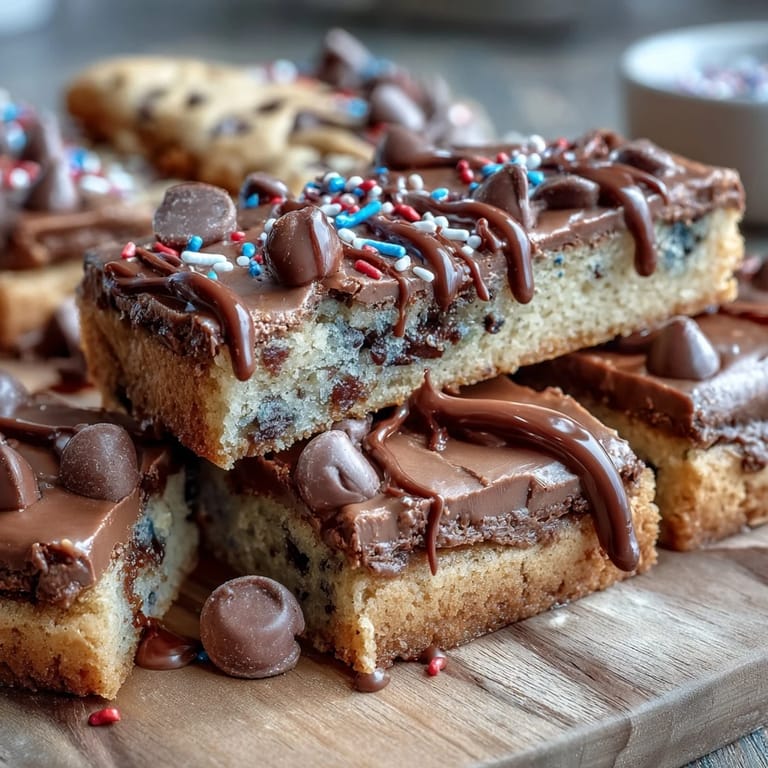
Save My cousin texted me three weeks before graduation asking if I could make something for her party that screamed celebration without screaming stress. These cookie bars landed on my counter that same afternoon, and I realized they were exactly what she needed—something that looked fancy enough to impress her friends but honest enough that even a kitchen-rushed person like me could pull them off. The white chocolate drizzle feels like edible confetti, and the colored candies let you sneak in school colors without anyone thinking you tried too hard. What started as a quick solution became the thing everyone asked for seconds of.
I still think about my friend Sarah's mom watching me pull these from the oven at 7 a.m. the day of graduation brunch, remarking that the kitchen smelled like brown sugar and possibility. She said that phrase so sincerely that I started laughing, and somehow that became the running joke of the whole party—brown sugar and possibility, whispered whenever someone took another bite.
Ingredients
- All-purpose flour (2 1/4 cups): This is your structure; don't skip the whisking step with the baking soda and salt, because clumps sneak in and ruin the texture later.
- Baking soda (1 tsp): This small amount lifts the bars just enough so they're chewy in the center and slightly crispy at the edges—the balance that makes them memorable.
- Salt (1/2 tsp): Sounds like a tiny detail, but it's the reason people say these taste better than they expected.
- Unsalted butter, melted and cooled (1 cup): Melting it first saves time, and cooling it slightly keeps the eggs from scrambling when you mix them in.
- Light brown sugar (1 cup) and granulated sugar (1/2 cup): The combination gives you depth and chew; using only one type leaves them either too cakey or too crispy.
- Eggs (2 large) and vanilla extract (2 tsp): These bind everything and add richness that makes people wonder if you used buttermilk or something fancy.
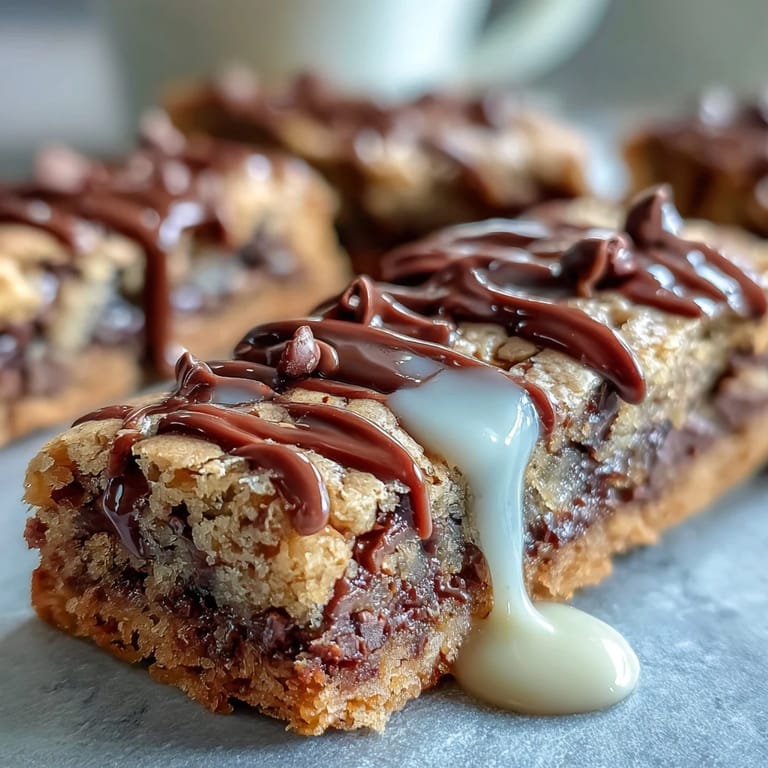
- Semi-sweet chocolate chips (1 cup): Go for a decent quality if you can; cheap chips taste waxy once they cool.
- Colored candy-coated chocolates (1/2 cup): This is where the celebration lives; pick whatever school colors or vibe you're going for, and don't be shy with them.
- White chocolate (4 oz) and vegetable oil (1 tsp): The oil keeps the white chocolate from seizing up, which I learned the hard way after two ruined batches.
Tired of Takeout? 🥡
Get 10 meals you can make faster than delivery arrives. Seriously.
One email. No spam. Unsubscribe anytime.
Instructions
- Set up your station:
- Preheat the oven to 350°F and line your 9x13-inch pan with parchment paper, letting it hang over the edges like little handles. This step takes two minutes and saves you from broken bars and frustrated muttering later.
- Combine dry ingredients:
- Whisk together flour, baking soda, and salt in a medium bowl, making sure there are zero lumps hiding in the corners. Set it aside and try not to forget about it, which I have definitely done.
- Mix the wet base:
- In a large bowl, whisk the cooled melted butter with both sugars until it looks smooth and a little glossy. Add eggs and vanilla, whisking until everything looks combined and pale, which takes about a minute.
- Bring it together gently:
- Fold the dry ingredients into the wet mixture slowly, stirring just until you can't see any white streaks of flour. Overmixing here makes them tough, and you'll taste it, so resist the urge to be thorough.
- Add your celebration pieces:
- Stir in the chocolate chips and colored candies until they're evenly scattered throughout the dough. This is where it starts looking like a party is about to happen.
- Spread and bake:
- Pour the dough into the prepared pan and use a spatula to spread it into an even layer, right to the corners. Bake for 23 to 25 minutes until the edges are golden and a toothpick poked in the center comes out mostly clean, with maybe a few moist crumbs clinging to it.
- Cool completely:
- Let the bars cool all the way in the pan on a wire rack—this takes about an hour, and skipping it means your white chocolate drizzle will melt into puddles instead of setting into pretty stripes. I know waiting is annoying, but it matters.
- Melt and drizzle the white chocolate:
- Chop or chip your white chocolate into a microwave-safe bowl, add the vegetable oil, and microwave in 20-second bursts, stirring between each one until it's smooth and pourable. Drizzle it over the cooled bars with a spoon or piping bag, then add colored sprinkles if you want them to look even more like a celebration.
- Set and cut:
- Let the white chocolate harden completely before you lift the bars out of the pan using those parchment paper handles and cut them into 16 squares. Use a hot, dry knife for cleaner cuts, wiping it between each slice.
 Save
Save These bars ended up being the one thing people texted about after the party, asking for the recipe weeks later. There's something about a homemade bar with real chocolate and school colors that feels like you witnessed someone's accomplishment and decided to commemorate it with butter and sugar, which is maybe the most human way to celebrate.
Customizing Your Colors
The beauty of these bars is that they're a blank canvas waiting for your school pride. I've made them with navy and gold by sorting M&Ms like I was organizing a tiny candy election, and once I used red and white stripes of sprinkles because someone's team colors were subtle. The colored candies don't affect the taste at all, so you can go wild without worrying you've ruined anything; the only risk is that they start to look like a craft project, but even that feels okay for a graduation.
Storage and Make-Ahead Tips
These keep at room temperature in an airtight container for up to four days, which means you can make them the day before and feel organized and calm. I once made them two days early, and they were somehow even chewier, like they'd absorbed a little moisture and became more delicious with time. If you're making them for a weekend party, bake them on Thursday and drizzle on Friday for the freshest taste without the morning-of stress.
Why These Are Better Than Store-Bought
Bakery bars cost three or four dollars each, and homemade ones cost maybe fifty cents, which matters when you're making sixteen of them. More importantly, there's something about biting into a bar that you made in your own kitchen, tasting the quality chocolate and real vanilla, that feels like an accomplishment in itself. The white chocolate drizzle on store-bought bars sometimes tastes like wax; yours will taste like actual chocolate because it is.
- You control the chocolate quality and type, which changes everything about how they taste.
- The dough is thicker and chewier than most commercial versions, with actual texture instead of uniformity.
- They still taste good on day three, which is when you'll probably want to eat them anyway.
 Save
Save These bars are proof that graduation—or any celebration—doesn't need complicated recipes or hours in the kitchen. Make them for someone you're proud of, and watch their face light up when they taste the chewy center and see their school colors in chocolate form.
Recipe FAQs
- → How do I achieve chewy texture in these bars?
Using a combination of melted butter and sugars, along with careful mixing, helps create a tender, chewy texture. Avoid overmixing the flour to keep them soft.
- → What is the best way to melt white chocolate for drizzling?
Heat white chocolate with a small amount of vegetable oil in short intervals in the microwave, stirring between to ensure smooth consistency without burning.
- → Can I substitute candy colors for different occasions?
Absolutely! Using colored candy-coated chocolates and sprinkles lets you customize the bars to match any celebration or theme.
- → How should I store these bars to maintain freshness?
Store them in an airtight container at room temperature for up to four days to keep them moist and flavorful.
- → Can I use different types of chocolate chips?
Yes, semi-sweet, milk, or dark chocolate chips can be used based on preference without altering the overall texture significantly.