 Save
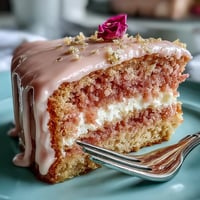
Save The soft tap of rain against my window was the soundtrack when I first decided to make a Taurus Zodiac Cookie Box for a friend’s spring birthday. The promise of lush, gold-accented sugar cookies shaped like stars and bulls felt like an invitation to play, not a chore. Baking always feels like conjuring, and for this recipe, the crackle of butter in the mixer and the sweet scent of vanilla made my kitchen feel positively charmed. Edible gold dust sparkled on my fingertips, proof that glamour and comfort can coexist on a rainy afternoon. It became an afternoon of messy laughter, golden smudges, and the satisfaction only perfectly shaped cookies can bring.
I remember the look on my sister’s face last May when I handed her a box of these cookies, every one painted with a Taurus constellation. She nearly refused to eat them, but the buttery aroma was too good to resist — within minutes, crumbs sprinkled her shirt and she was asking for the recipe. That day, the cookies became part of our family’s inside jokes about star signs and who was the most stubborn Taurus of them all. The moment made me realize these aren’t just cookies, they’re a conversation starter. Every batch since, I’ve thought about how a simple edible paintbrush can spark so much joy.
Ingredients
- All-purpose flour: This is the main structure of the cookie; I’ve learned that carefully measuring and sifting keeps them extra tender.
- Unsalted butter: The heart of the flavor, and softening it properly is the secret to that melt-in-your-mouth crumb.
- Granulated sugar: Gives structure and that classic sweet bite — a little less and the gold will steal the show, but too much and it loses elegance.
- Large egg: It binds the dough and encourages a golden shade when baked.
- Pure vanilla extract: Vanilla rounds out the buttery notes — real vanilla makes a difference in subtler recipes like this.
- Almond extract: Optional, but just a splash lifts the whole box with a gentle, almost floral aroma (or try citrus zest when feeling playful).
- Salt: Even in cookies, a touch enhances all the other flavors — don’t skip it.
- Powdered sugar: The key to royal icing that’s smooth and glossy, perfect for those gold finishes.
- Egg whites or meringue powder: They set the icing like porcelain; I sometimes use meringue powder for peace of mind.
- Lemon juice: Adds brightness and keeps the icing from tasting flat.
- Edible gold luster dust: This is pure Taurus luxury, and a little goes a long way in making each cookie feel like a treasure.
- Clear alcohol (vodka/lemon extract): Don’t worry — it evaporates, leaving behind shimmering gold detail without smears.
Tired of Takeout? 🥡
Get 10 meals you can make faster than delivery arrives. Seriously.
One email. No spam. Unsubscribe anytime.
Instructions
- Mix the Dough:
- Cream the butter and sugar until it’s pale and fluffy, listening for that gentle whir as the mixer turns — it means you’re close. Beat in the egg, vanilla, and almond (if using) so it smells like a bakery in springtime.
- Bring the Dough Together:
- In a separate bowl, whisk together flour and salt, then mix into your wet ingredients until just combined, the dough soft and ready to shape.
- Chill for Easy Rolling:
- Divide dough into two discs, wrap snugly, and chill; it’s a pause that makes later rolling easier and less sticky.
- Shape and Bake:
- Roll out the dough to a quarter-inch thick on a flour-dusted counter, then use star or Taurus cutters to stamp out shapes — don’t worry about perfection. Arrange the cookies on parchment, bake until the edges blush gold, and let them cool till they’re touchable without crumbling.
- Royal Icing Time:
- Whip egg whites (or meringue powder and water) until they form soft peaks, then gently rain in the powdered sugar. Add lemon juice and vanilla, beating until the icing is stiff and oh-so-glossy — tint if you wish, and load up your piping bags.
- Decorate Like a Star:
- Outline and flood each cookie with royal icing, letting them set untouched for a couple of hours. Mix luster dust with clear alcohol to create gold paint and brush on constellations, horns, or tiny stars — wait for the shine to dry completely.
- Assemble Your Box:
- Layer parchment in a pretty box, arrange your golden cookies, and slip in a zodiac card if you want to complete the surprise.
 Save
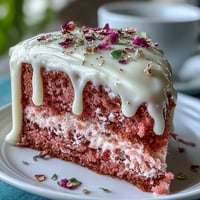
Save Our book club was never one for fancy desserts, but when I showed up with a box of these shimmering Taurus cookies, something shifted. By the time the night ended, the table was littered with gold-flecked crumbs and laughter echoed well past the last page. Those cookies turned a routine Tuesday into something quietly unforgettable. I think we all sensed that sometimes a little touch of gold is all you need. The cookies really were the star that night.
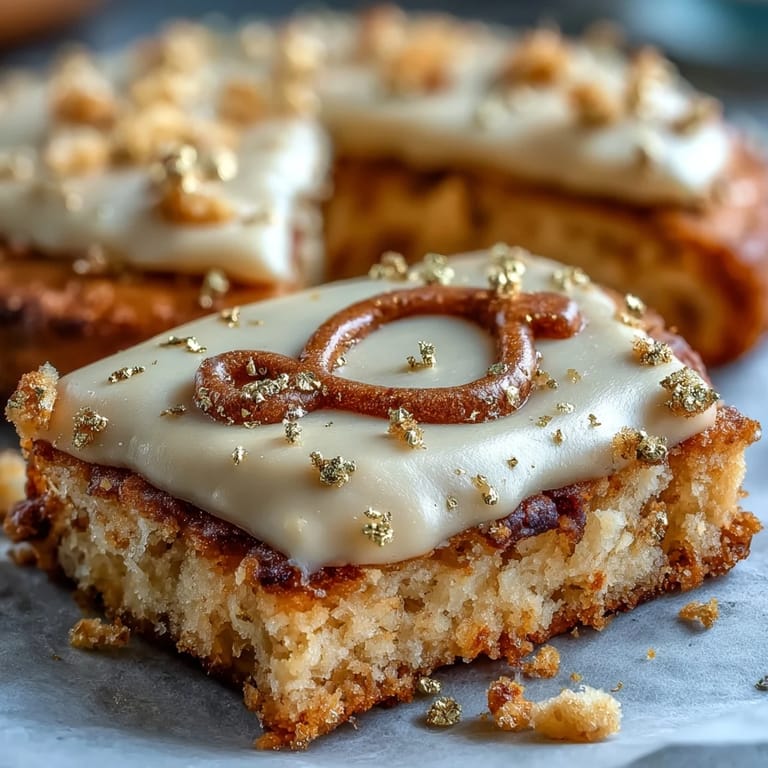
Decorating Tricks for Gold Royal Icing
The first time I tried mixing luster dust and alcohol, I was nervous it’d become a sticky mess — but the paint turned out silky and easy to control. A light hand and a fine brush work wonders for tracing constellations or adding subtle gleams along a bull’s horn. If the paint is too thick, just add another drop of alcohol until it glides. Letting each design dry fully before stacking is the best way to avoid smudges, even if you’re in a hurry. Once you get the knack, gold detailing becomes almost addictive.
Shape and Size Variations
I discovered that using different zodiac or celestial cutters gives each box a unique feel, and mixing star, moon, and bull shapes tells more of the Taurus story. Kids can help roll out the dough and choose their shape, making it feel like a collective kitchen adventure. If you don’t have the perfect cutter, a knife and a little patience can make charming constellations or horns freehand. No two boxes have ever looked quite the same in my house. Flexibility is part of the fun.
Cookie Box Assembly Ideas
Arranging the cookies in a box with layers of parchment adds an extra layer of anticipation when unboxing. Sometimes I tuck in little zodiac fact cards or a sprinkle of edible glitter for sparkle. Wrapped with a green or pink ribbon, the box is even more Taurus-inspired.
- If you’re transporting the cookies, double up the parchment to keep the icing safe.
- Write your recipient’s name in gold for extra flair.
- Always let the icing dry completely before stacking – patience pays off in the end.
 Save
Save Even when the kitchen gets a bit flashy and floury, these Taurus cookies deliver joy worth every minute. Gift them or keep them for yourself — either way, a little gold can make any ordinary afternoon feel a touch more magical.
Recipe FAQs
- → How do I prevent sugar cookies from spreading?
Keep butter slightly cool, chill the dough at least 30 minutes before rolling, and work on a lightly floured surface. Roll to an even 1/4-inch thickness and chill cut shapes briefly on the baking sheet before baking to help them hold shape.
- → What consistency should royal icing be for flooding?
Flooding icing should flow slowly off a spoon and level within about 10–15 seconds (a loose-paste consistency). Use thicker icing for outlines and piping, and slightly thin portions with a few drops of water to flood areas.
- → Can I avoid raw egg whites in royal icing?
Yes—use meringue powder mixed with water according to package directions for a stable, safe royal icing. Aquafaba can work as a vegan alternative but may yield a slightly different sheen and drying time.
- → How do I apply edible gold without smudging the icing?
Let flood icing dry fully (2 hours surface-set, overnight for best results). Mix gold luster dust with a few drops of clear alcohol or lemon extract to make paint, then use a fine brush to add accents once the iced surface is completely dry.
- → How long should I wait before boxing decorated cookies?
Wait until all icing and gold detailing are fully dry—typically a few hours to overnight depending on humidity. Ensure decorations are firm to the touch to avoid marks during packing.
- → What is the best way to store these cookies for gifting?
Layer cookies in a gift box with parchment between layers and keep at cool room temperature in an airtight container. Avoid humid conditions; they generally stay best for up to 4–5 days when stored properly.