Save
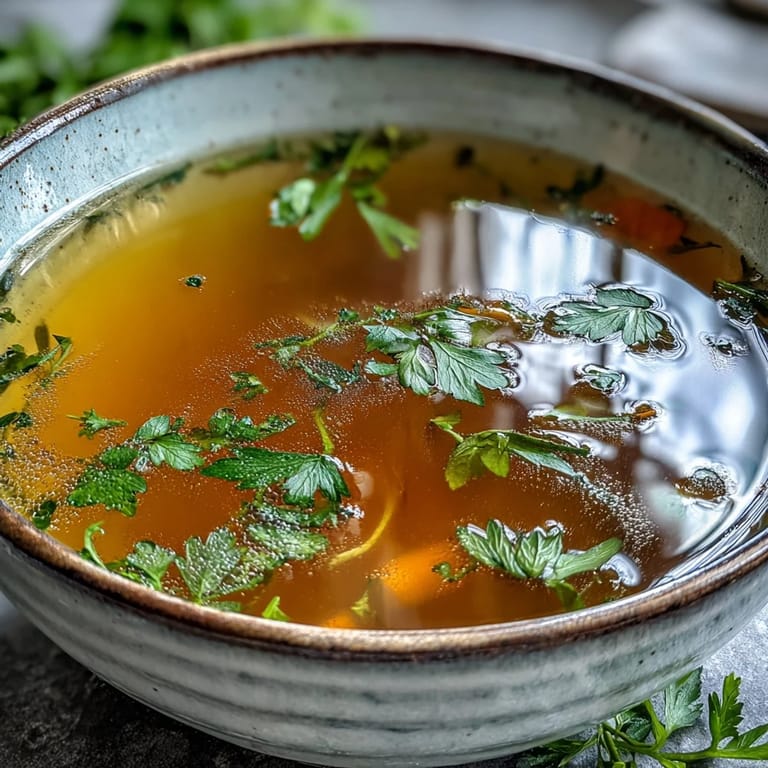
Save My freezer used to be a graveyard of vegetable scraps until a friend mentioned she saves them all in a bag, turning them into golden broth every few weeks. The first time I tried it, I was skeptical—how could carrot peels and onion skins become something so deeply flavored and satisfying? But there it was, simmering on the stove, filling my kitchen with an aroma that somehow smelled more like home than anything I'd bought from a store. Now I find myself saving scraps with purpose, almost excited about what they'll become.
Last winter, my neighbor stopped by and caught the smell of broth simmering on my stove. I poured her a mug and watched her face shift from curiosity to genuine surprise at how good it tasted, especially knowing it came from scraps I would have thrown away. She's been hoarding her own scraps ever since, and now we trade broth batches like we're running an underground operation. That's when I realized this wasn't just about saving money—it was about creating something that felt like abundance from what we almost wasted.
Ingredients
- Vegetable Scraps (5–6 cups assorted): Carrot peels, onion skins, celery ends, leek tops, mushroom stems, and parsley stems are your MVPs here—they carry the most flavor and don't turn the broth bitter or murky.
- Bay Leaves (2): These add a subtle earthiness and help round out the flavor, so don't skip them even though they're small.
- Black Peppercorns (8–10 whole): Whole peppercorns release their flavor slowly and keep the broth clear; ground pepper will cloud it.
- Garlic (2 cloves, optional): Smashed cloves add warmth without overpowering, but go easy since garlic can become sharp if simmered too long.
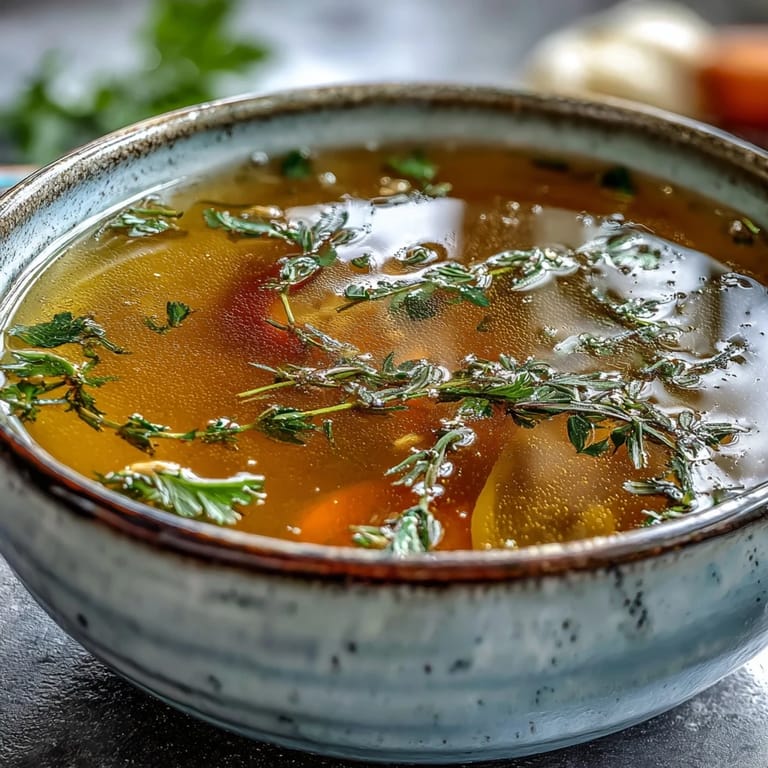
- Fresh Herbs (1 small handful parsley or thyme): These brighten the broth, though they're optional; save the woody stems for the pot and tender leaves for finishing soups.
- Salt (1–2 teaspoons): Start conservative and taste as you go, since broth concentrates as it simmers.
- Cold Water (2 liters or 8 cups): Cold water helps you skim impurities more effectively than hot water would.
Tired of Takeout? 🥡
Get 10 meals you can make faster than delivery arrives. Seriously.
One email. No spam. Unsubscribe anytime.
Instructions
- Collect Your Scraps Thoughtfully:
- Keep a freezer bag handy and save clean vegetable trimmings over a week or two—carrots, onions, leeks, celery, mushrooms, garlic, and herb stems are perfect. Avoid bitter vegetables like broccoli, cauliflower, or excessive cabbage, which will muddy the broth's clean flavor.
- Build Your Pot:
- Dump all your scraps into a large stockpot along with bay leaves, peppercorns, garlic if using, and salt, then pour in cold water until everything is covered. The cold start helps trap flavors and makes it easier to skim foam.
- Bring to a Gentle Boil:
- Turn the heat to medium-high and let it come to a rolling boil, watching for gray foam that rises to the surface. This foam is proteins and impurities, and skimming it off keeps your broth clear and clean-tasting.
- Simmer Low and Slow:
- Once boiling, reduce heat to a bare simmer—you want just a gentle bubble every few seconds, not an aggressive roll. Let it bubble away uncovered for a full hour, occasionally skimming any foam that surfaces, which keeps the broth refined.
- Taste and Adjust:
- After an hour, spoon some broth into a small cup, let it cool slightly, and taste it. Add more salt if it tastes flat, or a pinch of pepper if it needs depth.
- Strain with Care:
- Set a fine-mesh sieve over a large bowl and pour the broth through slowly, letting gravity do the work rather than pushing solids through. If you want it absolutely crystal-clear, line your sieve with cheesecloth and pour gently.
- Cool and Store:
- Let the broth cool to room temperature before transferring to airtight containers; it'll keep in the fridge for up to five days or frozen for three months. Cool broth will reveal a thin layer of fat on top—you can skim this off or leave it for extra richness.
 Save
Save There's something deeply satisfying about sipping a mug of broth on a quiet morning, knowing that what's warming your hands is something you built from nothing, literally from pieces you almost discarded. It feels a little like alchemy, and a lot like caring for yourself without fanfare.
Elevating Your Broth with Umami
If you want to push your broth into richer, more restaurant-quality territory, toss a piece of dried kombu or a handful of dried shiitake mushrooms into the pot while it simmers. I learned this trick by accident when I had leftover mushrooms drying on my counter, and now I keep a stash specifically for broth-making days. The umami deepens in ways that feel almost luxurious for something made from scraps, and it transforms the broth into something worthy of sipping on its own.
Building a Scrap-Saving Habit
The real secret is making scrap-saving automatic—keep a bag in your freezer and toss trimmings in as you cook dinner or prep vegetables for other meals. After a week or two, you'll have enough for a full pot of broth, and the beauty is you're never thinking about it as a project, just a natural part of your cooking rhythm. Some people use dedicated containers, others just roll with whatever freezer bag has room; the method matters less than the consistency.
Broth Beyond Soup
While this broth shines as a soup base, it's equally stunning sipped from a mug on a cold day, used to cook rice or grains instead of water, or whisked into sauces for extra depth. I've poured it over roasted vegetables, used it to braise tough cuts of greens, and even added it to stews where it rounds out the other flavors with quiet complexity. Think of it less as a single-use ingredient and more as a building block that sits at the foundation of countless meals.
- Freeze broth in ice cube trays for single-serving portions that thaw quickly in sauces or grains.
- Taste your broth after it's cooled completely, since flavors mellow as it cools and you might feel differently about seasoning.
- Label and date your containers so you remember when you made it and stay on top of freshness.
 Save
Save This broth is a love letter to cooking without waste, and every sip reminds you that some of the best things come from what we almost threw away. Once you start making it, you'll find yourself saving scraps out of habit, and your kitchen will smell better for it.
Recipe FAQs
- → What vegetable scraps work best for homemade broth?
Carrot peels, onion skins, celery ends, leek tops, mushroom stems, garlic skins, and parsley stems create the most flavorful base. These aromatic vegetables release deep, savory notes when simmered.
- → Why should I avoid broccoli and cabbage in my broth?
Cruciferous vegetables like broccoli, cauliflower, Brussels sprouts, and cabbage can impart a bitter, sulfurous taste when simmered for long periods. Stick to milder aromatics for a cleaner, more balanced flavor.
- → How long does homemade vegetable broth last?
Your broth will stay fresh in the refrigerator for up to 5 days when stored in airtight containers. For longer storage, freeze in portion-sized containers or freezer bags for up to 3 months without losing quality.
- → Can I use frozen vegetable scraps?
Absolutely. Collect scraps in a freezer bag until you have 5–6 cups, then proceed with the method. Freezing actually helps break down cell structures, potentially extracting even more flavor during simmering.
- → What can I add for a deeper umami flavor?
Dried shiitake mushrooms or a piece of kombu seaweed add rich umami depth. A splash of soy sauce or a tomato also enhances savory notes if you want a more robust broth.